- See also
- Module Debug for more information.
- examples/Arduino-Helpers/Debug for example usage.
Adding a 'Debug' menu in the Arduino IDE
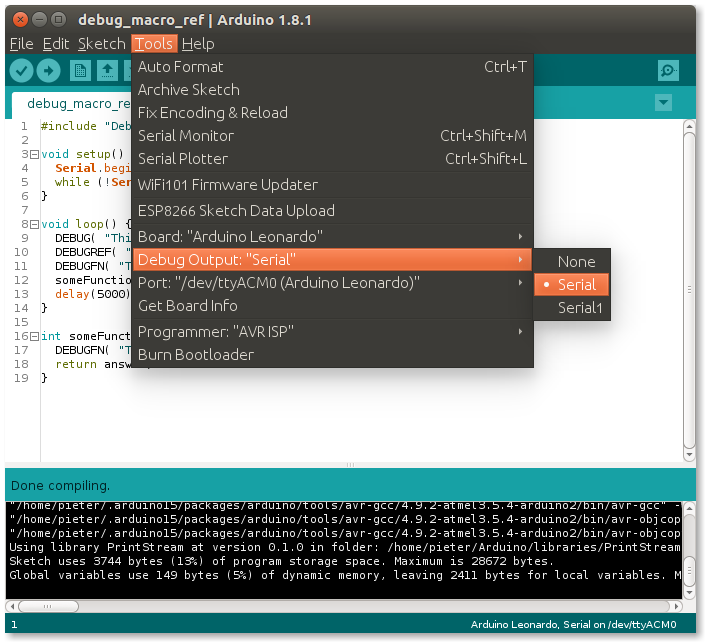
If you are going to be debugging a lot, it might be useful to just add a menu option in the IDE to disable/enable debugging.
This can be done relatively easily by editing the boards.txt file.
Open the boards.txt file of the board you are using. If you're using version 1.8.x of the Arduino IDE, it'll be located in ~/.arduino15/packages/<package-name>/hardware/<architecture>/<version>/ or C:\users\<username>\AppData\Local\Arduino15\packages\<package-name>\hardware\<architecture>\<version>\.
Open it using a text editor (e.g. Gedit on Linux, or Notepad on Windows).
First, create the menu option by adding the following line at the top of the file:
Then for your board, just add the different debug options.
For example, if you're using an Arduino UNO:
Next, add the debugging flags to the compilation options by adding the line:
If your board already has an extra_flags entry, just add {build.debug_output} to the end (separated by a space). For example:
A complete list of all the AVR boards and their added debug options can be found here.
Finally, restart the IDE.
If you now open your the Tools menu in the Arduino IDE, you should see the debug options: 